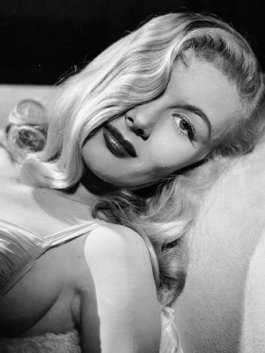
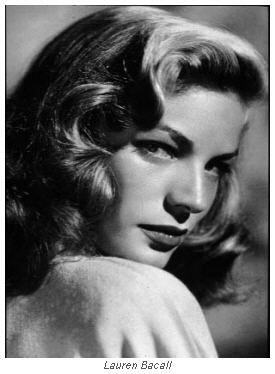
The 1940s was an era of wonderful, elegant locks that are an eternal fashion stamp in women hairstyle fashion. Most of us have probably looked back with fascination at the women hairstyles of the 1940s era, seen on numerous movie stars and celebrities of that period. Gorgeous curls were the absolute definition of delicate femininity and have become real fashion staples that are very much in vogue nowadays as well.
If you want to step back a few decades in order to try out how would you look wearing a chic 1940s curly hairstyle you don’t need the help of a professional hairstylist. Following our tips, you can easily create a fabulous, retro inspired hairstyle using some bobby pins and a few hairstyling products to keep your magical tresses in place.
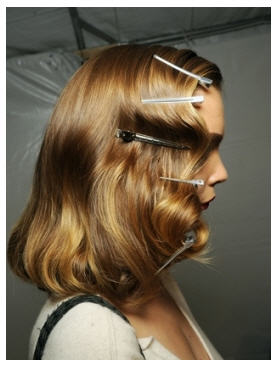
In order to create the soft, sculpted look of the 1940s, you will need to pin all of your hair in pin curls. As a first step, comb your freshly washed hair well to get rid of all the tangles then towel dry until its damp. Apply a small amount of setting lotion or mousse into your hair in order to make your curls last. Proceed with dividing your locks into small sections, rolling each hair segment around your fingers and then pushing them to the root of your hair.
Fix the curls one by one using bobby pins that can be purchased in any cosmetic store. It is advisable to secure each of your tresses with two bobby pins in order to hold them down and keep them in place. Put the first bobby pin across the middle of the curl, securing the little doughnut-like hair rolls to the hair underneath. The second bobby pin should go in a vertical angle to the first bobby pin, crossing the first one, creating a virtual “X” on the hair roll.
Don’t forget that the thicker the rolls, the looser the curls and the tighter you roll them around your finger, the curlier your locks will be. Continue the same way with the rest of your tresses, creating many little hair rolls and securing them on your head.
When you are ready with the pin curls, leave them in your hair for about 7-8 hours, or preferably overnight, in order to let them dry perfectly and create lasting curls.
To avoid waking up with destroyed curls, you can put on a hairnet to protect your ringlets while you are sleeping.